- Search the 'Drupal 7 Theme from Scratch' Site
- Create a Drupal 7 Theme from Scratch
- What Drupal Does with Your Content
- Drupal 7 Theme Templates
- Basic Drupal 7 Template Hierarchy
- Drupal 7 Theme File Structure
- The Drupal 7 .info File
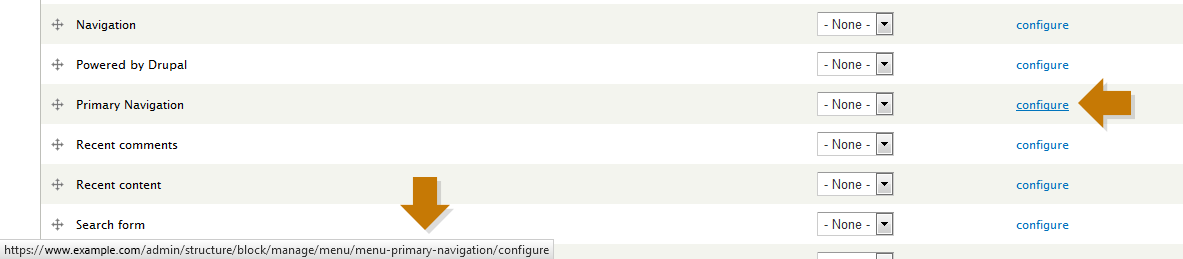
- Your Theme's Templates Folder
- How Drupal 7 Sorts Through Templates
- Remove All the Unnecessary DIVs and Classes from Your Drupal 7 Templates
- Drupal 7 Template Tip!
- The html.tpl.php Template
- The page.tpl.php Template
- The node.tpl.php Template
- Inserting Blocks Without Using Regions
- Recap on the Drupal 7 Template Heirarchy
- A Realistic View of Drupal 7 Templates
- Your Drupal 7 Home Page Template
- The Drupal 7 Node Template
- A Basic node.tpl.php
- More Drupal 7 Theme Templates
- The Drupal 7 Taxonomy Page Template
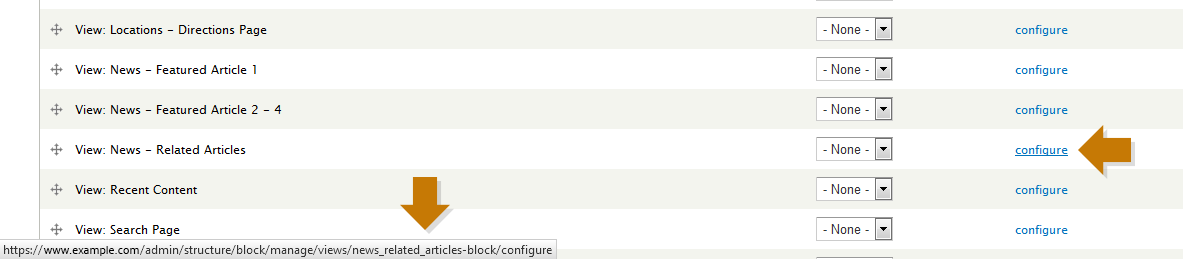
- The Views Module Templates
- Views Block Templates
- An Easier Way to Use Views Templates
- Add a View to a Node Template
- Views Module Settings
- Views Page Templates
- Views Module Tip!
- Overview of Our Drupal 7 Templates
- The Drupal 7 template.php File
- Understanding PHP
- Drupal's Template.php File
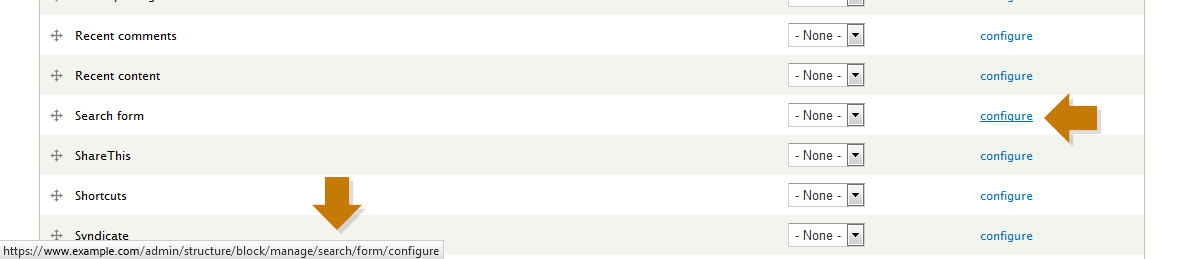
- Change Drupal's Search Form Input Type
- Change and Add Attributes to a Drupal Form
- Turn Off Unnecessary Drupal Stylesheets
- Remove Drupal's Search Form from the Search Results Page
- Drupal 7 User Page Templates
- Remove List 'Item' Classes from Drupal Menus
- Advanced Drupal 7 Theming Techniques
- Image or Video?
- Less Templates Thanks to IF
- Taxonomy Based Content
- Break Up the Date Fields
- Passing Variables to Views
- Use IF/Else to Alter HTML Tags
- Add 'Load More' (infinite scroll) to Search Results
- Add 'Load More' (infinite scroll) to Taxonomy Pages
- Use an Image for a CSS Background
- Show 4 Possible Content Scenarios Based on Date Field
- Identify a Search Result's Content Type
- Wrap a DIV around an Exposed Form
- Add 'Edit Page' Links to the Top of Pages
- Useful Drupal Tidbits
- 404 Error Pages
- Overlay Module
- Drupal Modules I Recommend
- Date Module
- Date Formats
- Search Settings
- Create a Module for Drupal 7
- Comments Welcome
M
E
N
U
E
N
U